
Git is one of the most important tools in modern software development. Nearly every team relies on it to manage source code, collaborate, and track project history.
Yet for beginners, Git often feels intimidating.
Developers create branches with names like test123 or asd. Commits say things like “update”, “fix”, or even “…”. Pull requests contain dozens of unrelated files, temporary changes, and sometimes even accidental edits.
And the worst part? Many developers don’t realize this is a problem.
In a real team environment, sloppy Git usage quickly turns into chaos. Imagine trying to find the commit that broke the build when the history looks like this:
fix
update
changes
fix again
Good luck.
Git is not just a storage system for code. It is a communication tool between developers.
In this guide, you’ll learn how Git actually works and how to use it in a way that makes collaboration smooth and professional.
Git Is Not Magic — It’s Just a Graph
Before learning commands, it’s important to understand what Git really stores.
Git keeps project history as a graph of commits.
Each commit represents a snapshot of the project at a specific moment in time.
A commit contains:
- file changes
- author information
- timestamp
- a unique hash
- a commit message
A branch is simply a pointer to a commit.
When you create a new commit, the branch pointer moves forward.
A simplified commit graph might look like this:
A --- B --- C (main)
       \
        D --- E (feature/auth)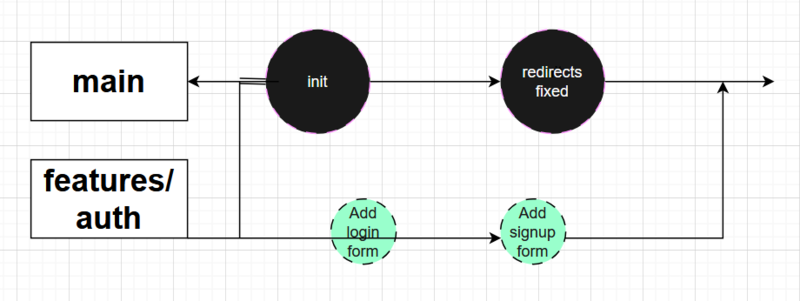
In this example:
-
maincontains the stable project history -
feature/authis a separate branch for developing a new feature - once the feature is complete, it gets merged back into
main
This isolation is what allows teams to work safely without interfering with each other.
Types of Git Branches
For small projects, teams often only use one main branch and a few temporary branches.
But larger projects usually follow a structured workflow. One popular example is Git Flow.
Git Flow defines several types of branches.
Main branches
main
The production-ready branch. Everything here should be stable and deployable.
develop
The integration branch where new features are combined before release.
Temporary branches
feature/*
Branches used to develop new functionality.
Example:
feature/user-authenticationrelease/*
Used to prepare a new release.
Tasks may include:
- bug fixes
- documentation updates
- version bumps
hotfix/*
Urgent fixes applied directly to production code.
Example:
hotfix/security-patchA simpler workflow for beginners
Most teams teaching Git to newcomers use a simpler model:
main
  ├─ feature/add-login
  ├─ feature/create-api
  └─ fix/email-validation
Each task gets its own branch.
When the task is done, the branch is merged and deleted.
Creating Your First Branch
git clone https://github.com/example/project.gitMove into the project directory:
cd projectMake sure your main branch is up to date:
git switch main
git pull origin main
Now create a new branch for your task:
git switch -c feature/add-user-modelThis command:
- creates a new branch
- switches to it immediately
Older Git versions used:
git checkout -b feature/add-user-modelBoth commands do the same thing.
Naming Branches Correctly
Branch naming conventions matter more than beginners think.
Bad example:
branch1
new-feature
test
Good examples:
feature/add-user-service
bugfix/login-error
hotfix/token-expiration
General rules:
- use lowercase
- avoid spaces
- use hyphens or slashes
- avoid non-ASCII characters
Clear names help the entire team understand what the branch contains.
Making Meaningful Commits
After writing some code, the next step is creating commits.
Imagine we add a simple JavaScript class:
class User {
  constructor(name, email) {
    this.name = name;
    this.email = email;
  }
}
Before committing, Git needs to know which files to include.
Add the file to the staging area:
git add src/main/project/User.jsYou can also add all changes:
git add .But this is risky — temporary files might accidentally be committed.
It is usually safer to add files explicitly.
Creating the commit
git commit -m "Add User class"This works, but the message could be better.
A good commit message answers two questions:
- What changed?
- Why did it change?
Writing Good Commit Messages
A commonly used structure is:
Short summary (max ~50 characters)

Detailed explanation of why the change was needed.
Explain important technical details if necessary.
Example:
Add User class for authentication module
Stores name and email fields used in login flow.
Email must be unique and will be validated by database
constraints in the next task.
Good commit messages help future developers understand the reasoning behind code changes.
And often that future developer is you six months later.
Conventional Commits
Many teams use the Conventional Commits standard.
It adds a prefix describing the type of change.
Examples:
feat: add password reset endpoint
fix: prevent crash on empty email
docs: update installation guide
refactor: move validation logic to service
test: add login unit tests
chore: update dependencies
Common prefixes:
| Prefix | Meaning |
|---|---|
| feat | new feature |
| fix | bug fix |
| docs | documentation changes |
| style | formatting only |
| refactor | code improvements without behavior change |
| test | new or updated tests |
| chore | tooling or configuration changes |
Example commit history:
feat: add User entity
fix: validate email format
refactor: extract email validation utility
test: add negative login tests
This makes the project history easy to understand.
It also enables tools that automatically generate changelogs.
Sending Code to GitHub
Once your work is committed, push it to the remote repository.
git push origin feature/add-user-modelIf the branch doesn’t exist on the server yet, Git will create it.
After pushing, go to GitHub (or GitLab) and you’ll see a button:
Create Pull Request
What Is a Pull Request?
A Pull Request (PR) is a request to merge your changes into another branch.
Usually:
feature branch → mainPull requests allow teammates to:
- review code
- suggest improvements
- detect bugs early
This process is called code review.
Always Sync Before Opening a PR
Before creating a pull request, update your branch with the latest changes.
git fetch origin
git rebase origin/main
This places your commits on top of the newest main branch.
If conflicts appear, you resolve them locally instead of inside the pull request.
Professional teams strongly prefer this approach.
Writing a Good Pull Request Description
Never leave a pull request description empty.
A good PR description should include:
What was done
- Added
Userclass - Implemented email validation
How to test
mvn testAdditional notes
- Prepared for upcoming authentication module
This saves reviewers time and speeds up approvals.
Useful Git Habits
Here are several habits that experienced developers follow.
Always check changes before committing
git statusUse .gitignore
Exclude files like:
node_modules/
build/
target/
.idea/
.vscode/
logs/
Keep commits small
Each commit should represent one logical change.
Write meaningful commit messages
Future debugging depends on it.
Git Is a Development Culture
Git is not just a set of commands.
It is a culture of collaboration.
Good Git practices make projects easier to maintain, easier to debug, and easier to scale.
They allow teams to:
- understand code history
- safely collaborate
- track changes with confidence
Once these basics become second nature, developers can explore more advanced topics:
- merge conflicts
- rebasing workflows
- interactive rebasing
- multi-remote repositories
- release management
But mastering branches, commits, and pull requests is the first and most important step.