
Hono is a cutting-edge, lightweight backend framework designed for cloud-native applications. Built on Node.js, Hono is optimized for speed and scalability, making it perfect for building high-performance APIs and services. Its minimalistic design allows developers to quickly create efficient, scalable solutions for modern cloud environments. Hono also offers support for edge computing, middleware, and routing, making it an excellent choice for developers looking to build cloud-native applications with minimal overhead and maximum performance.
Create a simple Backend
We will use Bun - an another JavaScript runtime, and Node.js-compatible package manager. If you are not familiar with Bun, please read this article - Getting Started with Bun .
1. Install Hono
Using target directory … hono-demo
? Which template do you want to use? bun
? Do you want to install project dependencies? yes
? Which package manager do you want to use? bun
 Cloning the template
 Installing project dependencies
 Copied project files
Get started with: cd hono-demo
Move to hono-demo
cd hono-demoInstall dependencies
bun install2. Run the Hono app
Change the default port
// index.ts
import { Hono } from 'hono';

import { Hono } from 'hono';

const app = new Hono();

app.get('/', c => {
  return c.text('Hello Hono!');
});

export default {
  port: 4200,
  fetch: app.fetch,
};
Run the app
bun devResult:
$ bun run --hot src/index.ts
Started server http://localhost:4200
Now the HTTP requests coming to the Bun server will be handled by Hono framework, providing us with a much more convenient API.
3. Grouped Routing in Hono.JS
According to the official Hono documentation, the framework supports grouped routing, allowing you to organize routes using an instance of Hono and add them to the main application using the route method.
Let’s create a post.ts inside a routes folder. Don’t forget to export posts as the default export:
// routes/post.ts
import { Hono } from 'hono';
import { Hono } from 'hono';
const post = new Hono();
post.get('/', c => c.text('List Posts')); // GET /post
post.get('/:id', c => {
// GET /post/:id
const id = c.req.param('id');
return c.text('Get Post: ' + id);
});
post.post('/', c => c.text('Create Book')); // POST /post
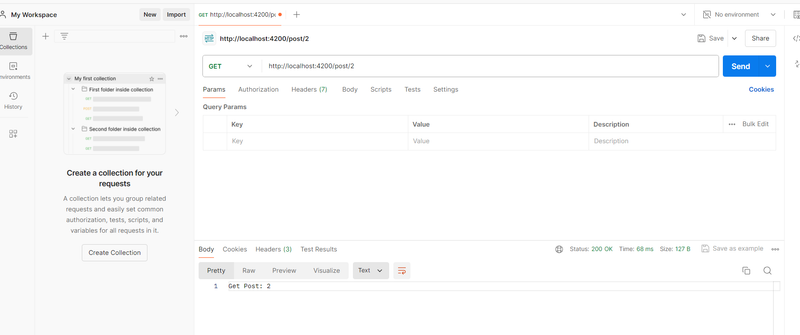
export default post;Open Postman and navigate to http://localhost:4200/post/2 to test it
4. So, what exactly is the “c” in the arguments?
However, you might have noticed that c is used instead of req. This c stands for the context object, as detailed in the Hono.js documentation.
In practice, all incoming and outgoing data is managed by this context object. Hono allows you to return responses in various formats, not just JSON but also others, such as body, text, notFound, redirect and more.
Hono is also well-suited for handling and returning small amounts of HTML.
5. Rendering TSX/JSX
Although hono/jsx is typically used on the client side, it can also be utilized for server-side content rendering.
In the JSX section, there’s an example of a functional React component. Let’s try rendering it server-side:
Create a post page inside a pages folder:
// pages/post.tsx
import { FC, PropsWithChildren } from 'hono/jsx';

import { FC, PropsWithChildren } from 'hono/jsx';

type PostData = {
  title: string;
  id: string;
};

const Layout: FC = ({ children }: PropsWithChildren) => {
  return (
    <html>
      <body>{children}</body>
    </html>
  );
};

const PostComponent = ({ title, id }: PostData) => {
  return (
    <Layout>
      <h1>Hello {title}</h1>
      <p>Your id is {id}</p>
    </Layout>
  );
};

export default PostComponent;
Now Let’s connect it to our post route:
// routes/post.tsx

post.get('/:id', c => {
  // GET /book/:id
  const id = c.req.param('id');
  return c.html(<PostComponent id={id} title={' World!'} />);
});
Open http://localhost:4200/post/2 in your browser to test it.
This approach is similar to SSR in Next.js or Remix.js, but it’s much lighter. Hono also supports other features like asynchronous components, Suspense, and more.
6. Middleware
Middleware is a function that integrates into the routing process and performs various operations.
You can intercept a request before it’s processed or modify a response before it’s sent.
HonoJS has a lot of built-in middleware, and you can add your own or reuse middleware created by the community.
Let’s take a look at the official example from the documentation.
Add this code to index.ts file, before routes initialization
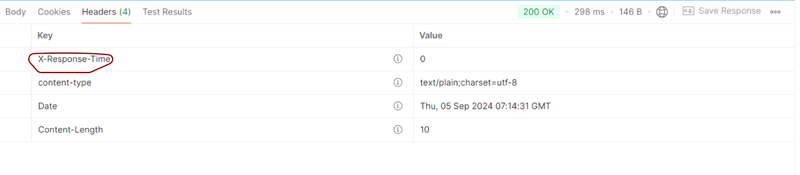
app.use(async (c, next) => {
  const start = Date.now();
  await next();
  const end = Date.now();
  c.res.headers.set('X-Response-Time', `${end - start}`);
});
Check the result in Postman
7. Handling redirects
You can create a redirect using the c.redirect() method:
c.redirect('/go-there');
c.redirect('/go-there', 301);
8. Handling CORS
To enable our application to work with a frontend framework, we need to implement CORS. Hono offers a cors middleware for this purpose. Import and configure this middleware in your index.ts file:
import { cors } from 'hono/cors';

import { cors } from 'hono/cors';

app.use('/api/*', cors());
9. Testing
Create index.test.ts file:
import { describe, expect, test } from 'bun:test';
import { Hono } from 'hono';
import { testClient } from 'hono/testing';

import { describe, expect, test } from 'bun:test';
import { Hono } from 'hono';
import { testClient } from 'hono/testing';

describe('Example', async () => {
  const app = new Hono().get('/', c => c.json('Hello Hono!'));
  const res = await testClient(app).$get();
  test('GET /post', async () => {
    const res = await app.request('/');
    expect(res.status).toBe(200);
    expect(await res.json()).toEqual('Hello Hono!');
  });
});
Now run
bun testbun test v1.1.26 (0a37423b)
src\index.test.ts:
✓ Example > GET /post
1 pass
0 fail
2 expect() calls
Ran 1 tests across 1 files. [301.00ms]Conclusion
Creating a simple backend with Hono is both straightforward and efficient. With its lightweight design and built-in features, Hono allows you to quickly set up a server capable of handling a variety of tasks, from routing to middleware integration. By leveraging Hono’s powerful capabilities, such as built-in support for CORS and flexible response formats, you can build reliable backend solutions with minimal effort. Whether you’re developing a small-scale application or experimenting with new ideas, Hono provides the tools you need to get your project up and running smoothly.