
Raster images lose quality when you scale them up. Vector formats like SVG don’t. Here we’ll build a browser-based tool that converts raster images into stylized vector shapes using Three.js and Vite — the finished result runs entirely client-side.
Demo: image-vectorizer.vercel.app
Code: github.com
Why Three.js?
Three.js makes it easy to work with WebGL, enabling complex visualizations and image manipulations. We will use it to process images and transform them into vector-based shapes.
Advantages of Using Three.js for Vectorization:
WebGL support for fast rendering
Flexible image processing capabilities
Ability to use shaders and post-processing
1. Setting Up the Project
First, initialize a Vite project:
npm create vite@latest image-vectorizer —template vanilla
Then, install Three.js:
Adding Tailwind CSS to a Vite Project
To integrate Tailwind CSS into your Vite + Three.js image vectorization project, follow these steps:
1. Install Tailwind CSS
Run the following command in your project directory:
2. Configure Vite
Open/create vite.config.ts and add the @tailwindcss/vite plugin:
import tailwindcss from '@tailwindcss/vite';
import { defineConfig } from 'vite';

import tailwindcss from '@tailwindcss/vite';
import { defineConfig } from 'vite';

export default defineConfig({
  plugins: [tailwindcss()],
});
3. Add Tailwind to CSS
Replace style.css with a new file src/index.css and add Tailwind’s base styles:
@import 'tailwindcss';

:root {
  font-family: Inter, system-ui, Avenir, Helvetica, Arial, sans-serif;
  line-height: 1.5;
  font-weight: 400;

  color-scheme: light dark;
  color: rgba(255, 255, 255, 0.87);
  background-color: #242424;

  font-synthesis: none;
  text-rendering: optimizeLegibility;
  -webkit-font-smoothing: antialiased;
  -moz-osx-font-smoothing: grayscale;
}

body {
  margin: 0;
  display: flex;
  flex-direction: column;
  place-items: center;
  min-width: 320px;
  min-height: 100vh;
}

h1 {
  font-size: 3.2em;
  line-height: 1.1;
}

#app {
  margin: 0 auto;
  text-align: center;
}

@media (prefers-color-scheme: light) {
  :root {
    color: #213547;
    background-color: #ffffff;
  }
}
It contains all the styles for the entire project.
2. Project Structure
Your project folder should look like this:
image-vectorizer/
│── public/
│── src/
│── index.html
│── package.json
│── tsconfig.json
3. HTML Structure
Modify index.html to include:
<!DOCTYPE html>
<html lang="en">
  <head>
    <meta charset="UTF-8" />
    <meta
      name="description"
      content="mage Vectirized is an open-source Three.js tool that converts images into scalable 3D vector graphics. Explore real-time vectorization and the power of WebGL for interactive design."
    />
    <meta name="viewport" content="width=device-width, initial-scale=1.0" />
    <link href="/src/style.css" rel="stylesheet" />
    <title>Image Vectirized - Open-Source ThreeJS Tool</title>
  </head>
  <body class="overflow-x-hidden">
    <div id="app"></div>
    <script type="module" src="/src/main.ts"></script>
  </body>
</html>
4. Create UI Components
Button Component
Create src/ui/button.ts file:
type BtnVariant = 'primary' | 'secondary' | 'upload';

export function setupButton(
  element: HTMLButtonElement,
  text: string,
  href: string,
  variant: BtnVariant = 'primary'
) {
  element.innerHTML =
    variant === 'primary'
      ? `
      <a
        class="inline-block rounded-sm px-8 py-3 text-sm font-medium text-white bg-gray-800 transition hover:scale-105 hover:shadow-xl focus:ring-3 focus:outline-hidden cursor-pointer"
        href=${href}
      >
        ${text}
      </a>
  `
      : variant === 'secondary'
        ? `
    <a
    class="inline-block rounded-sm bg-gray-500 px-8 py-3 text-sm font-medium text-white transition hover:scale-105 hover:shadow-xl focus:ring-3 focus:outline-hidden cursor-pointer"
    href=${href}
  >
    ${text}
  </a>
  `
        : `
    <input type="file" id="fileInput" value="Upload Image" style="display: none"
    accept="image/*" />
    <label for="fileInput" class="inline-block rounded-sm px-8 py-3 text-sm font-medium text-gray-800 bg-gray-100 transition hover:scale-105 hover:shadow-xl focus:ring-3 focus:outline-hidden cursor-pointer"> Upload Image </label>
  `;
}- The function sets the
innerHTMLofabutton based on the provided variant. - If
'primary'or'secondary', it creates an<a>button linking tohref. - If
'upload', it creates a file upload input with a styled label. - Uses Tailwind CSS classes for styling and hover effects.
This approach enhances reusability and maintains clean, structured code for different button types.
Header component:
Create a header.ts file inside the src folder:
export function setupHeader(header: HTMLElement) {
  header.className = 'bg-white';
  header.innerHTML = `
    <div class="mx-auto px-4 sm:px-6 lg:px-8 w-screen">
      <div class="flex h-16 items-center justify-between">
        <div class="flex-1 md:flex md:items-center md:gap-12">
          <a class="group flex items-center gap-4" href="/"><span class="sr-only">Home</span>
            <svg class="group-hover:stroke-gray-700 stroke-black" width="30px" height="30px" viewBox="0 0 48 48" id="a" xmlns="http://www.w3.org/2000/svg"><defs><style>.b{fill:none;stroke-linecap:round;stroke-linejoin:round;}</style></defs><path class="b" d="M29.4995,12.3739c.7719-.0965,1.5437,.4824,1.5437,1.2543h0l2.5085,23.8312c.0965,.7719-.4824,1.5437-1.2543,1.5437l-23.7347,2.5085c-.7719,.0965-1.5437-.4824-1.5437-1.2543h0l-2.5085-23.7347c-.0965-.7719,.4824-1.5437,1.2543-1.5437l23.7347-2.605Z"/><path class="b" d="M12.9045,18.9347c-1.7367,.193-3.0874,1.7367-2.8945,3.5699,.193,1.7367,1.7367,3.0874,3.5699,2.8945,1.7367-.193,3.0874-1.7367,2.8945-3.5699s-1.8332-3.0874-3.5699-2.8945h0Zm8.7799,5.596l-4.6312,5.6925c-.193,.193-.4824,.2894-.6754,.0965h0l-1.0613-.8683c-.193-.193-.5789-.0965-.6754,.0965l-5.0171,6.1749c-.193,.193-.193,.5789,.0965,.6754-.0965,.0965,.0965,.0965,.193,.0965l19.9719-2.1226c.2894,0,.4824-.2894,.4824-.5789,0-.0965-.0965-.193-.0965-.2894l-7.8151-9.0694c-.2894-.0965-.5789-.0965-.7719,.0965h0Z"/><path class="b" d="M16.2814,13.8211l.6754-6.0784c.0965-.7719,.7719-1.3508,1.5437-1.2543l23.7347,2.5085c.7719,.0965,1.3508,.7719,1.2543,1.5437h0l-2.5085,23.7347c0,.6754-.7719,1.2543-1.5437,1.2543l-6.1749-.6754"/><path class="b" d="M32.7799,29.9337l5.3065,.5789c.2894,0,.4824-.193,.5789-.4824,0-.0965,0-.193-.0965-.2894l-5.789-10.5166c-.0965-.193-.4824-.2894-.6754-.193h0l-.3859,.3859"/></svg>
            <span class="text-black group-hover:text-gray-700">Image Vectorizer</span>
         </a>
      </div>

        <div class="flex items-center gap-4">
          <button id="github__btn"></button>
      </div>
    </div>
  </div>`;
}
Hero component:
export function setupHero(element: HTMLElement) {
  element.className = 'mt-10';
  element.innerHTML = `
  <div class="mx-auto max-w-screen-xl px-4 py-8 sm:px-6 lg:px-8">
    <div class="flex flex-col md:flex-row items-center gap-4 md:gap-8 justify-center">
        <div class="max-w-lg md:max-w-none">
          <h1 class="text-3xl font-semibold text-gray-900 sm:text-4xl">
            3D Image Vectorizer
          </h1>

          <p class="mt-4 text-gray-700 max-w-2xl">
            3D Image Vectorizer converts raster images into high-quality 3D vector graphics. It enhances scalability, precision, and editability for 3D modeling, printing, and animation.
          </p>
        </div>
        <img
          src="vectorized-image.png"
          class="rounded w-80 sm:w-96 max-w-96 mt-10"
          alt="Image Vectorizer Example"
        />
      </div>
  </div>
`;
}
Canvas Component:
canvas.ts - the most complicated component in our app:
import * as THREE from 'three';
import { OrbitControls } from 'three/examples/jsm/controls/OrbitControls.js';

import * as THREE from 'three';
import { OrbitControls } from 'three/examples/jsm/controls/OrbitControls.js';

export function setupCanvas(element: HTMLDivElement): void {
  const canvas = document.querySelector('canvas') as HTMLCanvasElement;
  const width = window.innerWidth / 1.5;
  const height = window.innerHeight / 1.5;

  const renderer = new THREE.WebGLRenderer({
    canvas,
    antialias: true,
    preserveDrawingBuffer: true,
  });
  renderer.setPixelRatio(window.devicePixelRatio > 1 ? 2 : 1);
  renderer.setSize(width, height);
  renderer.setClearColor(0x000000);

  const scene = new THREE.Scene();
  const camera = new THREE.PerspectiveCamera(40, width / height, 0.1, 1000);
  camera.position.set(0, 0, 300);

  const group = new THREE.Group();
  scene.add(group);

  const downloadBtn = document.getElementById(
    'download-btn'
  ) as HTMLButtonElement;
  const fileInput = document.getElementById(
    'fileInput'
  ) as HTMLInputElement | null;

  if (fileInput) {
    fileInput.addEventListener('change', (event: Event) => {
      const uploadEvent = event.target as HTMLInputElement;
      if (!uploadEvent?.files?.length) return;

      const file = uploadEvent.files[0];
      const reader = new FileReader();

      reader.onload = e => {
        const img = new Image();
        img.onload = () => {
          const canvas2d = document.createElement('canvas');
          const ctx = canvas2d.getContext('2d');
          if (!ctx) return;

          const size = 200;
          canvas2d.width = size;
          canvas2d.height = size;
          ctx.drawImage(img, 0, 0, size, size);

          const data = ctx.getImageData(0, 0, size, size).data;
          group.clear();

          for (let i = 0; i < size; ++i) {
            const geometry = new THREE.BufferGeometry();
            const vertices = new Float32Array(size * 3);
            const colors = new Float32Array(size * 3);

            for (let j = 0; j < size; ++j) {
              const colorIndex = (j * size + i) * 4;
              const r = data[colorIndex] / 255;
              const g = data[colorIndex + 1] / 255;
              const b = data[colorIndex + 2] / 255;

              vertices.set([j - 100, i - 100, data[colorIndex] / 10], j * 3);
              colors.set([r, g, b], j * 3);
            }

            geometry.setAttribute(
              'position',
              new THREE.BufferAttribute(vertices, 3)
            );
            geometry.setAttribute(
              'color',
              new THREE.BufferAttribute(colors, 3)
            );

            const material = new THREE.LineBasicMaterial({
              vertexColors: true,
            });
            const line = new THREE.Line(geometry, material);
            group.add(line);
          }

          element.classList.remove('hidden');
          downloadBtn.classList.remove('hidden');
          downloadBtn.disabled = false;
        };
        if (e.target?.result) img.src = e.target.result as string;
      };
      reader.readAsDataURL(file);
    });
  }

  group.rotateZ(-Math.PI / 2);
  const controls = new OrbitControls(camera, renderer.domElement);

  function animate(): void {
    requestAnimationFrame(animate);
    controls.update();
    renderer.render(scene, camera);
  }
  animate();

  downloadBtn.addEventListener('click', () => {
    renderer.render(scene, camera);
    const link = document.createElement('a');
    link.href = canvas.toDataURL('image/png');
    link.download = 'vectorized-image.png';
    link.click();
  });
}
Explanation of the Code
This TypeScript code defines a function setupCanvas, which sets up a Three.js scene, processes an uploaded image, vectorizes it, and allows users to download the vectorized result as a PNG image.
export function setupCanvas(element: HTMLDivElement): void {}This function initializes the Three.js scene within the provided HTMLDivElement.
Creating the WebGL Renderer
const canvas = document.querySelector('canvas') as HTMLCanvasElement;
const width = window.innerWidth / 1.5;
const height = window.innerHeight / 1.5;

const renderer = new THREE.WebGLRenderer({
  canvas,
  antialias: true,
  preserveDrawingBuffer: true,
});- Finds an existing
<canvas>element in the DOM. - Sets canvas dimensions to ⅔ of the window size.
Creates a WebGL renderer with:
-
antialias: truefor smooth rendering. -
preserveDrawingBuffer: trueto enable downloading images.
renderer.setPixelRatio(window.devicePixelRatio > 1 ? 2 : 1);
renderer.setSize(width, height);
renderer.setClearColor(0x000000);- Adjusts pixel ratio for high-resolution screens.
- Sets canvas size.
- Uses a black background (
0x000000).
Setting Up Scene, Camera, and Group
const scene = new THREE.Scene();
const camera = new THREE.PerspectiveCamera(40, width / height, 0.1, 1000);
camera.position.set(0, 0, 300);

const group = new THREE.Group();
scene.add(group);- Creates a Three.js scene.
- Defines a Perspective Camera (FOV: 40°, aspect ratio based on canvas size).
- Moves the camera back (z = 300) to view the scene.
- Creates an empty group (
group) to hold objects and adds it to the scene.
File Upload Handling
const fileInput = document.getElementById(
  'fileInput'
) as HTMLInputElement | null;- Finds the file input (
<input type="file">) for image uploads.
if (fileInput) {
    fileInput.addEventListener('change', (event: Event) => {
        const uploadEvent = event.target as HTMLInputElement;
        if (!uploadEvent?.files?.length) return;

        const file = uploadEvent.files[0];
const reader = new FileReader();- Listens for file selection.
- Reads the uploaded file using
FileReader.
Processing Image into Vector Format
reader.onload = (e) => {
    const img = new Image();
    img.onload = () => {
        const canvas2d = document.createElement('canvas');
        const ctx = canvas2d.getContext('2d');
if (!ctx) return;- Creates a temporary 2D
<canvas>to process the image. - Gets the 2D rendering context (
ctx).
const size = 200;
canvas2d.width = size;
canvas2d.height = size;
ctx.drawImage(img, 0, 0, size, size);- Resizes the image to 200×200 pixels for performance.
const data = ctx.getImageData(0, 0, size, size).data;
group.clear();- Extracts pixel data from the canvas.
- Clears the 3D scene before drawing new content.
Generating the 3D Vectorized Image
for (let i = 0; i < size; ++i) {
    const geometry = new THREE.BufferGeometry();
    const vertices = new Float32Array(size * 3);
const colors = new Float32Array(size * 3);- Loops over each row (
i) of the image. - Creates geometry (
BufferGeometry) for each row of pixels.
for (let j = 0; j < size; ++j) {
  const colorIndex = (j * size + i) * 4;
  const r = data[colorIndex] / 255;
  const g = data[colorIndex + 1] / 255;
  const b = data[colorIndex + 2] / 255;

  vertices.set([j - 100, i - 100, data[colorIndex] / 10], j * 3);
  colors.set([r, g, b], j * 3);
}- Reads RGB values from the pixel data.
- Converts pixel positions into 3D coordinates (
x, y, z).
geometry.setAttribute('position', new THREE.BufferAttribute(vertices, 3));
geometry.setAttribute('color', new THREE.BufferAttribute(colors, 3));
const material = new THREE.LineBasicMaterial({ vertexColors: true });
const line = new THREE.Line(geometry, material);
group.add(line);- Creates a 3D line from the pixel data.
- Sets vertex positions and colors.
- Adds the line to the scene.
Making the Canvas and Download Button Visible
element.classList.remove('hidden');
downloadBtn.classList.remove('hidden');
downloadBtn.disabled = false;- Unhides the canvas and download button after processing the image.
Adding Camera Controls
group.rotateZ(-Math.PI / 2);
const controls = new OrbitControls(camera, renderer.domElement);- Rotates the group to align correctly.
- Enables mouse-based navigation using
OrbitControls.
Animation Loop
function animate(): void {
  requestAnimationFrame(animate);
  controls.update();
  renderer.render(scene, camera);
}
animate();- Uses requestAnimationFrame to continuously update the scene.
- Renders the 3D vectorized image.
Adding Image Download Functionality
downloadBtn.addEventListener('click', () => {
  renderer.render(scene, camera);
  const link = document.createElement('a');
  link.href = canvas.toDataURL('image/png');
  link.download = 'vectorized-image.png';
  link.click();
});- Captures the rendered canvas as a PNG.
- Creates a download link and triggers a click event.
- Saves the image as
vectorized-image.png.
This implementation is a simple yet powerful way to transform raster images into vectorized 3D representations using Three.js!
5. Combine all Component in main.ts
Edit main.ts file:
import { setupCanvas } from './canvas';
import { setupHeader } from './header';
import { setupHero } from './hero';
import './style.css';
import { setupButton } from './ui/button';

import { setupCanvas } from './canvas';
import { setupHeader } from './header';
import { setupHero } from './hero';
import './style.css';
import { setupButton } from './ui/button';

document.querySelector<HTMLDivElement>('#app')!.innerHTML = `
	<header></header>
	<section id="hero"></section>
	<section>
		<button id="upload-btn"></button>
	</section>
	<div class="flex flex-col items-center justify-center my-10 hidden" id="content">
		<canvas></canvas>
		<button id="download-btn" class="my-4">Download</button>
	</div>
	<section class="ml-4 mt-28 mb-10 flex flex-col gap-4 justify-center items-center max-w-[90%]">
	<div>
	<h2 class="text-2xl">About</h2>
	<p class="max-w-2xl my-4">
		3D Image Vectorizer is a simple open-source tool designed to showcase the capabilities of Three.js by transforming raster images into scalable 3D vector graphics. Developed as part of an article on JSDev Space, this tool demonstrates real-time image processing, depth mapping, and smooth vectorization using JavaScript and WebGL.
	</p>
	</div>
	</section>
	<footer class="flex items-center justify-center">3D Image Vectorizer -- All Rights Reserved ${new Date(Date.now()).getFullYear()}</footer>
`;
const header = document.querySelector<HTMLDivElement>('header')!;
const sectionHero = document.querySelector<HTMLDivElement>('#hero')!;
const uploadBtn = document.querySelector<HTMLButtonElement>('#upload-btn')!;
const downloadBtn = document.querySelector<HTMLButtonElement>('#download-btn')!;
const content = document.querySelector<HTMLDivElement>('#content');
let githubBtn = document.querySelector<HTMLButtonElement>('#github__btn');

header && setupHeader(header);
sectionHero && setupHero(sectionHero);
uploadBtn && setupButton(uploadBtn, 'Upload Image', '#', 'upload');
downloadBtn && setupButton(downloadBtn, 'Download', '#', 'primary');
content && setupCanvas(content);

if (githubBtn) {
  setupButton(githubBtn, 'github', '#');
} else {
  githubBtn = document.querySelector<HTMLButtonElement>('#github__btn');
  githubBtn && setupButton(githubBtn, 'github', '#');
}
This TypeScript code sets up the user interface for a 3D Image Vectorizer using modular components, Tailwind CSS, and Three.js. It structures the page, initializes UI elements, and sets up interactive features like file uploads and downloads.
Setting Up the Page Structure
document.querySelector<HTMLDivElement>('#app')!.innerHTML = `
	<header></header>
	<section id="hero"></section>
	<section>
		<button id="upload-btn"></button>
	</section>
	<div class="flex flex-col items-center justify-center my-10 hidden" id="content">
		<canvas></canvas>
		<button id="download-btn" class="my-4">Download</button>
	</div>
	<section class="ml-4 mt-28 mb-10 flex flex-col gap-4 justify-center items-center max-w-[90%]">
		<div>
			<h2 class="text-2xl">About</h2>
			<p class="max-w-2xl my-4">
				3D Image Vectorizer is a simple open-source tool designed to showcase the capabilities of Three.js by transforming raster images into scalable 3D vector graphics. Developed as part of an article on JSDev Space, this tool demonstrates real-time image processing, depth mapping, and smooth vectorization using JavaScript and WebGL.
			</p>
		</div>
	</section>
	<footer class="flex items-center justify-center">
		3D Image Vectorizer -- All Rights Reserved ${new Date(Date.now()).getFullYear()}
	</footer>
`;- Creates an HTML template dynamically and inserts it into the
#app<div>. -
<header>→ Placeholder for the site header. -
<section id="hero">→ The hero section. - Upload Button (
#upload-btn) → Users can upload an image. - #content Section (Hidden by Default)
- “About” Section → Describes the purpose of the tool.
- Footer → Displays current year dynamically using JavaScript.
Selecting and Configuring Elements
const header = document.querySelector<HTMLDivElement>('header')!;
const sectionHero = document.querySelector<HTMLDivElement>('#hero')!;
const uploadBtn = document.querySelector<HTMLButtonElement>('#upload-btn')!;
const downloadBtn = document.querySelector<HTMLButtonElement>('#download-btn')!;
const content = document.querySelector<HTMLDivElement>('#content');
let githubBtn = document.querySelector<HTMLButtonElement>('#github__btn');- Finds and stores references to key elements in the DOM.
Initializing Components
header && setupHeader(header);
sectionHero && setupHero(sectionHero);
uploadBtn && setupButton(uploadBtn, 'Upload Image', '#', 'upload');
downloadBtn && setupButton(downloadBtn, 'Download', '#', 'primary');
content && setupCanvas(content);
Safely initializes components if their elements exist:
-
setupHeader(header)→ Calls a function to set up the page header. -
setupHero(sectionHero)→ Calls a function to set up the hero section. -
setupButton(uploadBtn, 'Upload Image', '#', 'upload')→ Converts the upload button into a functional upload input. -
setupButton(downloadBtn, 'Download', '#', 'primary')→ Configures the download button. -
setupCanvas(content)→ Calls setupCanvas to initialize Three.js rendering.
This section wires the UI and renderer: the page layout is mounted, event handlers are attached, and setupCanvas() boots the Three.js scene.
6. Start the Project
Run Vite’s development server:
Vite will launch the local server, and you can test your image vectorization service in the browser.
7. Explanation of Key Features
Three.js Rendering: Converts pixel data into 3D points and lines.
OrbitControls: Allows users to rotate and zoom the 3D view.
File Upload: Loads an image and extracts pixel color data.
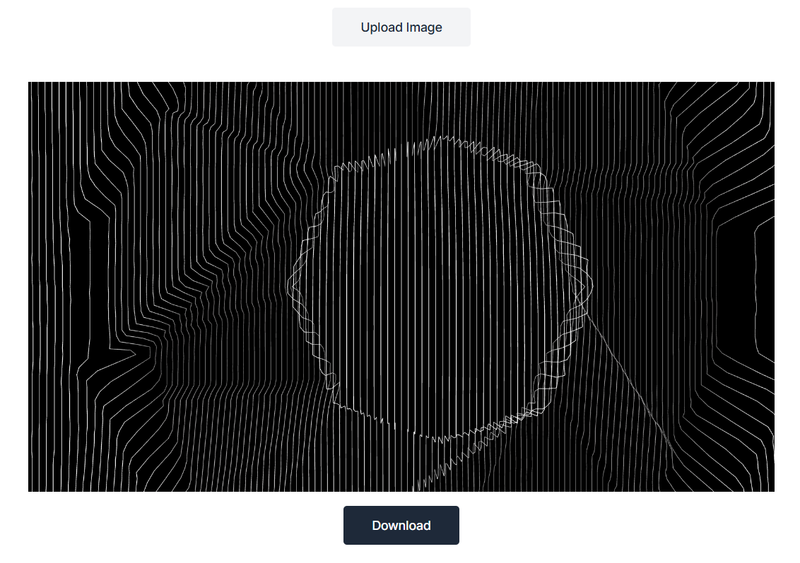
Vectorization: Transforms the image into a 3D point cloud representation.
Download Option: Captures the rendered scene and saves it as a PNG.
8. Conclusion
You now have a client-side baseline for image vectorization. Next improvements are mostly about quality and speed: better edge detection, smarter sampling, and lower memory usage during render.