
We’ll set up a monorepo with NestJS (server) and ReactJS (client) side by side, then configure workspaces for each of the four major package managers: npm, yarn, pnpm, and bun. Same project, four different setups — so you can pick the one that fits your team.
What You Will Learn
- Understanding monorepos and their benefits.
- Setting up a monorepo structure.
- Configuring NestJS and ReactJS within the monorepo.
- Managing dependencies with npm, Yarn, pnpm, and Bun workspaces.
1. Understanding Monorepos
Monorepos allow you to manage multiple projects within a single repository, promoting code sharing, consistent tooling, and streamlined development processes. This structure is especially beneficial for large applications or organizations with several related projects.
2. Setting Up the Monorepo Structure
Step 1: Create a new folder
Create a new directory for your monorepo and initialize it.
Step 2: Initialize the Monorepo
Next, add server and client folders, and initialize them.
npm init -y -w packages/server -w packages/client
This will create 2 new folders with package.json file, and 2 folders: server and client inside the node_modules directory.
#pnpm
pnpm init -y -w packages/server -w packages/client
#yarn
pnpm init -y workspaces focus packages/server workspaces focus packages/client
#Bun
Step 3: Installing Workspace Dependencies
Install the dependencies for all packages listed in the workspace configuration.
#pnpm
#yarn
#Bun
Step 4: Listing Dependencies Across Workspaces
Display the dependencies for all workspaces.
#pnpm
A pnpm workspace must have a pnpm-workspace.yaml file in its root.
Add this code:
- 'packages/client/*'
- 'packages/server/*'#yarn
#Bun
Add this code to package.json:
"workspaces": [
    "packages/client",
    "packages/server",
  ]
then
3. Install the ReactJS as client
We will use vite for creating a new react app with typescript
√ Current directory is not empty. Please choose how to proceed: » Remove existing files and continue
√ Select a framework: » React
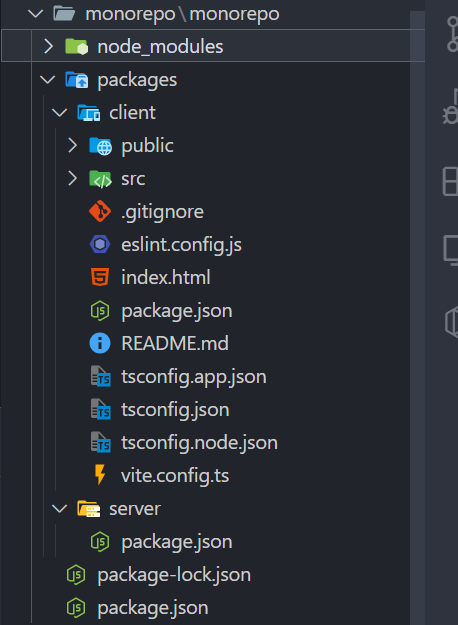
√ Select a variant: » TypeScript + SWCThe current structure of your project now looks like this:
pnpm
In pnpm, you will need to open a specific package
yarn
yarn workspace client create vite@latest . -w packages/client
Bun
4. Install the NestJS as server
Initialize the NestJS instance
npm i —save @nestjs/core @nestjs/common rxjs reflect-metadata @nestjs/platform-express -w server
pnpm
Don’t forget to rename the names of the packages.
yarn
Bun
5. Create separate NestJs project
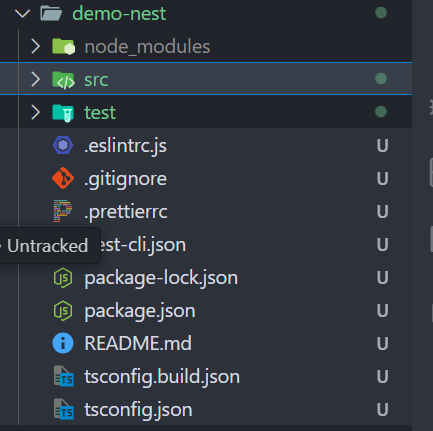
We need to create a new project to copy the starter files from it.
Now copy all files from the root directory as well as the src directory.
then run
6. Test the backend and frontend
Don’t forget to rename the names of package.json to server, or client.
Let’s test the packages…
ReactJS test
NestJS test
pnpm
yarn
Bun
7. Install server on client side
We will connect to the server by installing the server to the client as a dependency
or add the dependency to the package.json file
"dependencies": {
    "react": "^18.3.1",
    "react-dom": "^18.3.1",
    "server": "*"
  },
then run again
This way, you can utilize shared types and interfaces.
pnpm
yarn
Bun
Connect the frontend to the server
Enable Cors in NestJS
Add this code to main.ts file on NestJS server
async function bootstrap() {
  const app = await NestFactory.create(AppModule);
  app.enableCors();
  await app.listen(3000);
}
Now run the backend:
Connect client to server
First change the App.tsx file
import { useEffect, useState } from 'react';

import './App.css';
import './App.css';

function App() {
  const [data, setData] = useState('');

  useEffect(() => {
    const getData = async () => {
      const response = await fetch('http://localhost:3000');
      const data = await response.text();
      setData(data);
    };
    getData();
  }, []);

  return <>{data}</>;
}

export default App;
We use the response.text() method because it returns a string instead of JSON.
Now run

Resources
npm workspaces | pnpm workspaces | yarn workspaces | bun workspaces
Conclusion
A monorepo is most useful when your apps share code and release cadence. Start with one package manager, add shared contracts between server and client, and automate workspace scripts early.