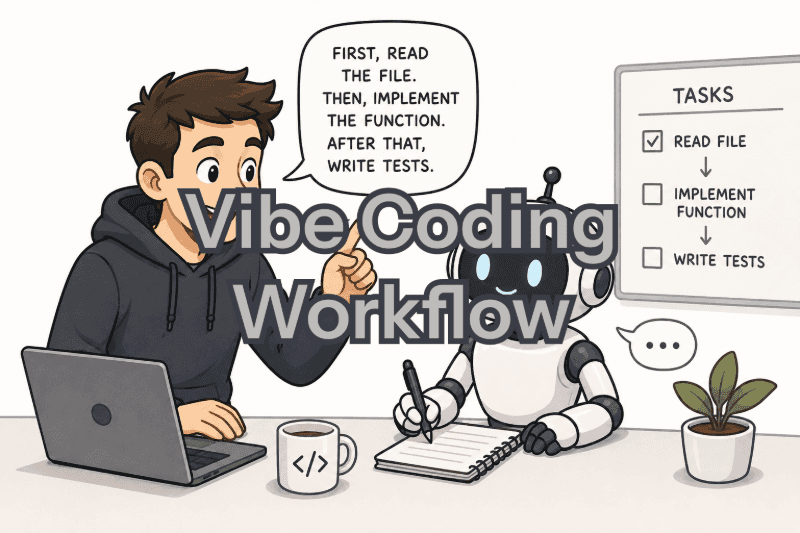
Vibe coding works surprisingly well when the project is small.
You describe what you want, the AI writes some code, you test it, ask for a couple of changes, and eventually you have something useful.
The problems usually begin when the project grows.
Now there are ten components instead of two. One feature depends on another. The database schema changes halfway through the implementation. The agent forgets a decision you made forty messages ago, then quietly invents a different solution.
At that point, adding a longer prompt doesn’t really solve anything.
A better approach is to stop treating the entire project as one conversation.
Instead, split development into four stages:
Requirements
     ↓
Design
     ↓
Tasks
     ↓
Implementation
Each stage produces files that become the input for the next one. That gives the agent something concrete to work from instead of relying on an increasingly messy conversation history.
The workflow is simple enough to use with almost any AI coding tool, but structured enough for larger projects where “just build this for me” stops working.
The Basic Prompt Structure
Before getting into the individual stages, it helps to use the same structure for most planning prompts.
I normally want six or seven things to be explicit:
## [Stage Name]

Goal:
What should be achieved in this stage?

Input:
Which files and information should be read?

Output:
What should be created, and where?

Steps:
What should happen, and in what order?

Constraints:
What is the agent not allowed to assume or change?

Completion criteria:
How do we know this stage is finished?

Fallback:
When should we return to an earlier stage?
You don’t have to follow this format religiously.
Its purpose is simply to remove ambiguity.
A prompt such as:
Build the authentication system.leaves almost everything open to interpretation.
Compare that with:
Goal:
Design the authentication module.

Input:
doc/requirement.md

Output:
Add the authentication design to doc/design.md.

Constraints:
Do not implement code yet.
Do not choose an authentication provider unless one is already specified.
Ask before making decisions that affect the database schema.

Completion criteria:
The design describes the authentication flow, data model,
public interfaces, error states, and testing strategy.
The second prompt gives the agent boundaries. That’s often more important than giving it more instructions.
Stage 1: Requirements
The first stage should contain as little implementation as possible.
Your job here is to figure out what you’re actually building.
Input: your description of the project and any known technical constraints.
Output:
doc/requirement.mdStart by describing the project in ordinary language.
You might know that you’re building a browser game with React, for example, but not know whether Three.js, React Three Fiber, or another rendering approach makes the most sense.
That’s fine.
Don’t ask the agent to silently fill those gaps.
Ask it to identify missing decisions and bring them back to you.
A useful starting prompt could look like this:
## Requirements

Goal:
Create a complete requirements document for the project.

Context:
I want to build a browser-based multiplayer game with React.

The project already exists and was created as a React application.
Libraries may be added when necessary.

I don't have much experience with 3D browser development.

Output:
doc/requirement.md

Steps:
1. Read the existing project structure.
2. Review the project description.
3. Identify missing product and technical requirements.
4. Ask me about anything that materially affects the project.
5. When the requirements are clear, create requirement.md.

Constraints:
Do not guess what I want when a requirement is ambiguous.
When there are several reasonable technical approaches, explain the
options briefly and ask me to choose when the decision matters.

Completion criteria:
The requirements document describes the expected functionality,
major user flows, constraints, and acceptance criteria.

Fallback:
If a later stage exposes a missing requirement, return here and update
requirement.md before changing the design.
The important part isn’t the exact wording.
It’s the rule that uncertainty should become a question rather than an assumption.
That alone prevents a lot of unnecessary rewrites later.
What Goes Into requirement.md?
Don’t turn the requirements file into a novel.
It should answer practical questions:
- What are we building?
- Who is it for?
- What can the user do?
- What are the important states and flows?
- What is explicitly outside the scope?
- Which technical constraints already exist?
- How will we know a feature is complete?
You can also record unresolved decisions.
For example:
## Authentication

Users must be able to sign in and preserve game progress.

Required:
- Email-based authentication
- Persistent sessions
- Logout
- Protected profile page

Open:
- Authentication provider has not been selected yet.
An honest Open section is much better than an agent quietly choosing something because the prompt happened to be vague.
Stage 2: Design
Once the requirements are stable, move to design.
I prefer doing this in a fresh session.
The new conversation doesn’t need your entire previous discussion. It needs the artifact produced by that discussion:
doc/requirement.mdThe goal of this stage is to decide how the application will be put together before generating large amounts of code.
Input:
doc/requirement.mdOutput:
doc/design.mdA prompt can be relatively short:
## Design

Goal:
Create a technical design for the project described in the requirements.

Input:
doc/requirement.md

Output:
doc/design.md

Steps:
1. Read the complete requirements document.
2. Identify the main modules.
3. Define the responsibility of each module.
4. Define how modules communicate.
5. Describe important data structures.
6. Describe major application flows.
7. Define a testing strategy for each module.

Constraints:
Do not implement the application yet.
Keep modules independent where practical.
Avoid hidden dependencies between modules.
Do not invent missing product requirements.

If a design decision depends on missing information, ask me first.

Completion criteria:
Every major module has a clear responsibility, dependencies,
interfaces, data structures, and testing approach.

Fallback:
If the design conflicts with requirement.md, stop and return to the
requirements stage.
This stage is where you want to catch architectural problems.
Not after 40 files have already been generated.
Design Around Boundaries
One of the easiest ways for an AI-generated project to become difficult to maintain is for everything to know about everything else.
Imagine a game containing these modules:
Game
├── Player
├── Inventory
├── Combat
├── Map
├── Networking
└── UI
The design shouldn’t just list those names.
It should describe their boundaries.
For example:
## Inventory

Responsibilities:
- Store player items
- Add and remove items
- Track item quantities
- Validate inventory capacity

Does not handle:
- Rendering inventory UI
- Saving directly to the database
- Network transport

Input:
Inventory commands

Output:
Updated inventory state and inventory events

Dependencies:
Item definitions
That makes implementation much easier for an agent.
The Inventory agent doesn’t need to understand the entire rendering system to implement addItem().
More importantly, it shouldn’t be allowed to redesign the rendering system because it happened to encounter a UI-related problem.
Stage 3: Break the Design Into Tasks
This is probably the most important part of the workflow.
Don’t give an agent:
Implement the inventory system.if “inventory system” represents two days of work.
Break it down.
Input:
doc/requirement.md
doc/design.md
Output:
doc/tasks/I like keeping one file per module:
doc/tasks/auth.md
doc/tasks/inventory.md
doc/tasks/combat.md
doc/tasks/map.md
Then add one global progress file:
doc/tasks/progress.mdThe prompt:
## Task Breakdown

Goal:
Convert the approved design into small implementation tasks.

Input:
doc/requirement.md
doc/design.md

Output:
doc/tasks/{module-name}.md
doc/tasks/progress.md

Steps:
1. Split the design by module.
2. Break each module into small executable tasks.
3. Record dependencies between tasks.
4. Assign priorities.
5. Add every task to progress.md.

Constraints:
Each task should be small enough to complete in one focused AI session.

A task file must contain enough context to execute the task without
reading the complete conversation history.

Do not add features that are not present in the requirements or design.

Completion criteria:
Every implementation requirement maps to at least one task.
Dependencies are explicit.
Each task can be implemented and verified independently.
Notice what we’re doing here.
We’re deliberately reducing the amount of context required for implementation.
That’s the opposite of the usual approach of feeding an agent more and more information until the prompt becomes enormous.
Make Tasks Small, But Not Meaningless
There’s a balance.
This is too large:
Build authentication.This is probably too small:
Create auth.ts.A useful task represents one coherent change that can be implemented and tested.
For example:
## AUTH-02: Session Validation

Priority:
P0

Depends on:
AUTH-01

Goal:
Implement server-side session validation.

Files:
src/auth/session.ts
src/auth/types.ts
tests/auth/session.test.ts

Requirements:
- Accept a session token.
- Return the authenticated user when valid.
- Return an unauthenticated result for expired sessions.
- Do not expose internal provider errors.

Tests:
- Valid session
- Expired session
- Missing token
- Invalid token

Completion:
Implementation passes the module tests and does not modify unrelated modules.
Now a new agent session can understand exactly what it has to do.
It doesn’t need fifty previous messages.
Track Progress in a File
For a small project, a Markdown checklist is often enough.
# Project Progress

## Authentication

- [x] AUTH-01 Define authentication types (P0)
- [ ] AUTH-02 Implement session validation (P0, depends on AUTH-01)
- [ ] AUTH-03 Add login endpoint (P0, depends on AUTH-02)
- [ ] AUTH-04 Add authentication tests (P1, depends on AUTH-03)

## Inventory

- [x] INV-01 Define item model (P0)
- [ ] INV-02 Implement inventory state (P0, depends on INV-01)
- [ ] INV-03 Implement inventory commands (P0, depends on INV-02)
- [ ] INV-04 Build inventory UI (P1, depends on INV-03)
This file has an important advantage over conversation history.
It survives the conversation.
A new session can read it and immediately see where the project stands.
It also gives the main agent a simple source of truth when several sub-agents are working on different parts of the project.
Stage 4: Implementation
Only now do we start asking agents to write the actual application.
At this point we have:
doc/requirement.md
doc/design.md
doc/tasks/
The implementation stage can produce one more file:
doc/prompt.mdThink of this as the operating manual for the coding agent.
It tells the main agent how to select tasks, delegate them, validate results, and update progress.
A starting prompt might look like this:
## Implementation

Goal:
Implement the project according to the approved requirements,
design, and task files.

Input:
doc/requirement.md
doc/design.md
doc/tasks/

Output:
Application source code
Tests
doc/prompt.md
Updated doc/tasks/progress.md

Workflow:
1. Read requirement.md and design.md.
2. Read progress.md.
3. Find the next unblocked P0 task.
4. Read that task's module document.
5. Implement only the selected task.
6. Run its tests and relevant project checks.
7. Review the resulting changes against the design.
8. Mark the task complete only after validation.
9. Continue with the next unblocked task.

Constraints:
Do not implement unspecified features.
Do not silently change the architecture.
Do not modify unrelated modules unless the task requires it.
Ask when a requirement or design decision is ambiguous.
Do not mark a task complete when its validation fails.

Completion criteria:
All required tasks are complete.
All required tests pass.
The final implementation matches requirement.md and design.md.
progress.md contains no unfinished required tasks.
This is where agent orchestration becomes useful.
Instead of one agent repeatedly jumping between UI, networking, tests, database code, and documentation, the main agent can work as a coordinator.
Main Agent and Sub-Agents
A simple model looks like this:
Main Agent
                       |
          +------------+------------+
          |            |            |
          v            v            v
      Auth Agent   Game Agent    UI Agent
          |            |            |
          v            v            v
        Tests        Tests        Tests
          \            |            /
           +-----------+-----------+
                       |
                       v
               Integration Check
                       |
                       v
                  progress.md
The main agent should understand the project as a whole.
A sub-agent doesn’t necessarily need to.
Its context can be much smaller:
Relevant requirements
        +
Relevant design section
        +
Task specification
        +
Required source files
This is one of the main reasons to write good task files.
If every sub-agent needs the entire project history before changing three files, the decomposition hasn’t really helped.
Don’t Let Agents Quietly Redesign the Project
This deserves its own rule.
Suppose a task says:
Implement the inventory UI using the existing inventory service.During implementation, the agent decides that the inventory service isn’t ideal.
It shouldn’t silently replace the service architecture.
It should report the problem.
Something like:
BLOCKED

Task:
INV-04

Problem:
The current design requires InventoryService.getItems(), but the
implemented service only exposes subscribe().

Affected design:
doc/design.md -> Inventory -> Public Interface

Suggested options:
1. Add getItems() to the service.
2. Update the UI design to consume subscriptions.

No architecture changes have been made.
Then the decision goes back to the appropriate stage.
This feels slower when you’re watching the agent work.
In practice, it can save a huge amount of cleanup.
Context Is a Resource
A common mistake in AI-assisted development is assuming that more context always produces better results.
It doesn’t.
Useful context produces better results.
A 40,000-token conversation containing old requirements, abandoned ideas, debugging attempts, and previous implementations may be worse than a 1,500-token task document containing exactly what the agent needs.
That’s why I prefer starting a fresh session at major stage boundaries.
For example:
Session 1
Requirements
      |
      v
requirement.md

Session 2
requirement.md
      |
      v
Design
      |
      v
design.md

Session 3
requirement.md + design.md
      |
      v
Task Breakdown
      |
      v
tasks/

Session 4+
Individual tasks
      |
      v
Implementation
The documents carry the decisions forward.
The conversation doesn’t have to.
Testing Should Be Part of the Task
Don’t write:
Implement the feature.and plan to add tests someday later.
The test belongs to the task.
For business logic, that will often mean unit tests.
For UI, it might mean component tests, interaction tests, visual regression tests, or E2E coverage depending on what the feature actually does.
I wouldn’t blindly require snapshot tests for every UI component. Snapshots can be useful, but they’re not automatically the best validation for interactive behavior.
A better task might say:
Validation:

Unit:
- Inventory rejects negative quantities.
- Adding an existing item increases its quantity.
- Removing the last item removes the entry.

UI:
- Inventory displays current items.
- Clicking Use triggers the expected command.
- Empty inventory renders the empty state.

Integration:
- Updated inventory state reaches the UI after a successful command.
Now “done” has an actual meaning.
Give Every Task a Definition of Done
Agents are very good at producing something that looks finished.
That isn’t the same as being finished.
Every task should have explicit acceptance criteria.
For example:
## Done When

- Implementation matches the approved interface.
- Required tests have been added.
- Tests pass.
- Linting passes.
- Type checking passes.
- No unrelated files were changed.
- Documentation is updated when the public API changed.
The main agent should check those conditions before changing:
[ ] AUTH-02to:
[x] AUTH-02That tiny rule makes progress.md much more trustworthy.
Common Failure Modes
Most failures I’ve seen in this workflow come from a handful of patterns.
| Problem | Better Approach |
|---|---|
| Requirements are vague | Ask questions before writing the design |
| The agent invents missing behavior | Record uncertainty instead of guessing |
| Modules are tightly coupled | Define interfaces and dependencies during design |
| Tasks are too large | Split them until one focused session can finish them |
| Tasks are too tiny | Keep one coherent implementation goal per task |
| A sub-agent lacks context | Put required interfaces and dependencies in the task file |
| Implementation changes architecture | Stop and return the decision to the design stage |
| Tests are postponed | Include validation in every implementation task |
| Progress becomes unclear | Keep one persistent progress.md |
| Context becomes enormous | Start fresh sessions and use documents as handoff artifacts |
The recurring theme is pretty simple.
Don’t use conversation history as your project management system.
A Practical Project Structure
You don’t need a complicated documentation platform for this.
Plain Markdown works.
project/
├── doc/
│   ├── requirement.md
│   ├── design.md
│   ├── prompt.md
│   │
│   └── tasks/
│       ├── auth.md
│       ├── inventory.md
│       ├── combat.md
│       ├── map.md
│       └── progress.md
│
├── src/
│   ├── auth/
│   ├── inventory/
│   ├── combat/
│   ├── map/
│   └── ui/
│
└── tests/
The names don’t matter much.
The separation does.
requirement.md explains what you’re building.
design.md explains how the system should be structured.
The task files explain what should be implemented next.
progress.md records what has actually been completed.
prompt.md tells the coding agent how to execute the plan.
That gives every document one clear job.
The Full Workflow
Put everything together and the process becomes:
Idea
 |
 v
Requirements
 |
 +--> Questions
 |
 v
requirement.md
 |
 v
Technical Design
 |
 +--> Architecture review
 |
 v
design.md
 |
 v
Task Breakdown
 |
 v
tasks/*.md
 |
 v
progress.md
 |
 v
Implementation
 |
 +--> Sub-agent
 |       |
 |       +--> Code
 |       +--> Tests
 |
 +--> Validation
 |
 +--> Update progress.md
 |
 v
Next Task
When something goes wrong, don’t automatically patch whatever file happens to be open.
Work out which layer is wrong.
If the product behavior was never defined, return to requirements.
If the requirement is correct but the architecture can’t support it cleanly, return to design.
If the design is fine but the task is too broad, rewrite the task.
If all three are correct, fix the implementation.
That distinction keeps local coding problems from turning into accidental architectural decisions.
A Short Version You Can Actually Use
If the complete process feels too formal, keep only these rules:
- Write requirements before generating the application.
- Turn the requirements into a technical design.
- Break that design into small tasks.
- Give each task its own acceptance criteria.
- Store progress outside the conversation.
- Give agents only the context they need.
- Test a task before marking it complete.
- Don’t allow implementation agents to silently change requirements or architecture.
That’s enough for most projects.
You can add more process when the project becomes large enough to need it.
Conclusion
The biggest improvement you can make to vibe coding isn’t a cleverer prompt.
It’s giving the AI less freedom at the right moments.
Use the first stage to decide what you’re building. Use the second to settle the architecture. Turn that architecture into small, self-contained tasks. Only then let coding agents work through the implementation.
The result is still AI-assisted development. It just stops depending on one enormous conversation remembering everything correctly.
And once a project grows beyond a weekend prototype, that difference starts to matter.